Whilst I was a little late to the MTB tubeless party I’ve been more of an early adopter on the road scene. I’ve been running tubeless on my mountain bike for around six or so years on ever so unfashionable 26″ wheels (I’m on even less fashionable 29 now). I never had any problems with it and carried a spare tube all that time for nothing.
Now I’m more into the road world I’ve had a go at using tubeless here. Firstly with some 40mm gravel type tyres (WTB Nano 40c) and now on proper road tyres. The former was a bit of a ghetto conversion with only one of the wheels having a tubeless compatible rim but have now had a proper set on wheels built for my audax bike. So rather than explaining it a bunch of times in 20 or so tweets I’ve listed down my method.
So first things first. Wheels. Or more importantly rims. You need compatible rims. Tubeless, TCS or whatever the brand calls them. Essentially they have a deeper hook on the profile to get a good seal. I’ve recently had some road wheels built to go tubeless and new MTB wheels for a little winter bike project.
For the road wheels I went with a SP Dynamo PD8-X and a Hope Pro II Evo for the rear. These were then built with black bladed spokes to some really nice Light Bicycle 35mm deep carbon sections. I’m using 28mm Schwalbe Pro Ones on these and have been brilliant. Lasted a good 3500km before needing to be changed.
On the mountain bike I went with the usual Hope Pro II (eBay bargains) and some WTB rims which were on offer at Planet-X (£9.99 each). I’m using Onza gumwall 2.25 tyres on these.
Before going too far I usually have the tyre on the rim the night before but with a normal tube in. I find this helps shape the tyre and gets the bead neatly seated on one side if you’re careful about how you take the tube out. I’ve found it to be less of an issue with road tyres but helps a bit with bigger volume MTB tyres and to take out the little nicks and folds from where they’ve been packaged up. Probably unnecessary but always like a little bit of extra prep.
In terms of bits you need at a minimum:
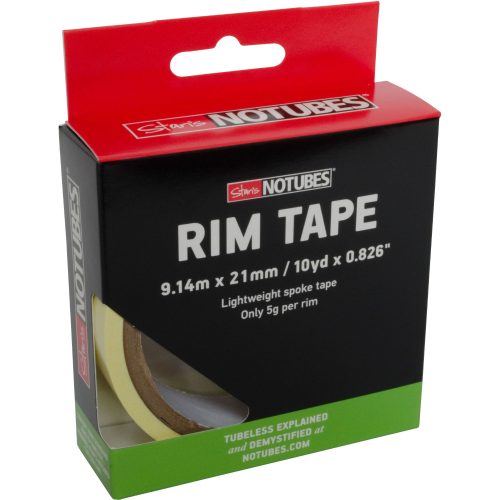
– Rim tape
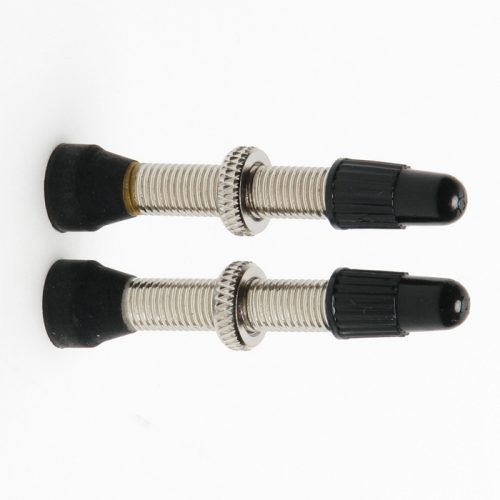
– Valves
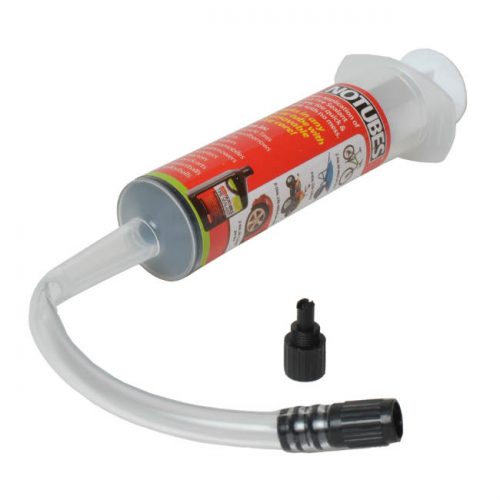
– Sealant
– Compatible rims
– Compatible tyres
– Some patience
The first step is getting the rim nice and air tight. The wheel builder I use usually does two layers of tubeless rim tape around for me but have also done it myself. I’ve used the Stans tape which comes in a variety of widths. Apparently you can get unbranded stuff on eBay also but you want good coverage from edge to edge to form a good seal. Essentially it’s a thick plastic tape which creates an air tight seal and stops the sealant leaking out in that direction. I clean the surface of the rim first with alcohol swaps first to get the best adhesion possible. Don’t worry about the fact you’ve sealed over where the valve would normally go for now.
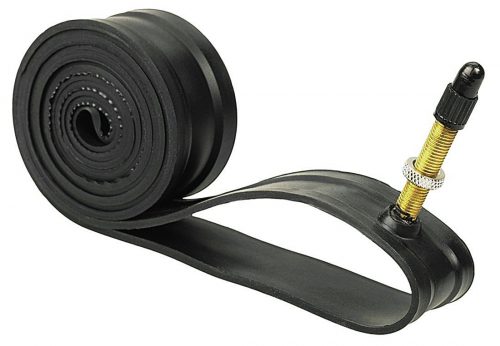
The alternative is to use a rubber rim strip with an integral valve which goes around and does the same thing. I haven’t had as much luck with these and didn’t get such a reliable seal. First time it worked ok but then subsequent times it was a mess and didn’t seal. I don’t recommend but your mileage may vary.
I now just use the rim tape and then the Stans valves. These obviously replace the valves you’d normally have with the tube in. These come in a couple of different sizes and you need to get ones that get through your rims but not too long ideally.
Once the rim tape is on you need to make a small hole at the valve hole in the rim. Then feed the valve through and wind it up tight so as to compress the rubber bung and form a good seal again. The latest top tip is to dip the rubber tip in sealant before winding it up. This further improves the seal as the sealant dries.
After that I get the tyre on, align the logo with the valve hole obviously, and then add some sealant to the system. There’s two ways of doing this. The first is to remove the valve core and use a syringe to add 30ml of sealant. The other way is to to just drop it in with the last bit of the tyre left off before carefully easing it back on. I’ve gone with the latter option recently and has worked well.
After that you need to get some air into it and at a fair old rate to force the bead onto the rim. This should be easier if you’ve had a tube in the night before. I’ve got most to work with a normal track pump and just going quickly but have also used a CO2 cartridge. I wasted the first one by not having the tyre fully over the valve. Now I just hold the tyre down over the valve hole to make sure the air is getting into the tyre. Other options are to use a special track pump that will build a volume of air and then dump it all in in one go or there’s an ‘airshot’ which is another type of the same thing.
If it’s successful you should hear the beads popping and sealing against the rim. I usually top it up with a track pump to make sure this process is completed.
After that I rotate the wheel and chuck it around a bit. Essentially throwing sealant all around the whole thing as far as possible. Wipe down any sealant and check for air leaking out. Leave overnight and hopefully it’s all good in the morning.
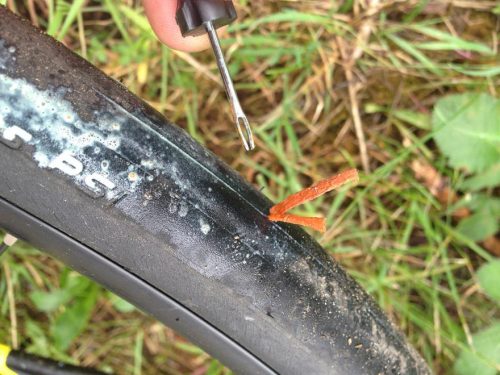
After that you should be good to go. In terms of repairing a tubeless tyre if you get a hole whilst riding… small ones should seal without too much fuss. You might need to top up with air a bit. Otherwise if it doesn’t seal then I put an ‘anchovy’. It’s a little rubber string which you push through the hole, pull out a bit and then trim the excess off. It’s much easier than it sounds! Kits are available and I also carry a tyre boot, a spare valve and a tube. I’ve not needed to use a tube so far though. This review of the kit I use on road.cc show exactly what you need to do!
This is another post that is a collection of research mainly for the benefit of others. I see so many people asking about the various topics below online and then answer the question in about 30 tweets or so. It’s easier to just link to this instead and avoid spamming up their timeline.
So this post is to deal with a few issues that come from riding your bicycle over longer distances and wanting to use electronic devices. Mainly audax, but essentially anything further than designed for within your standard lightning, phone charge and Garmin design. Most of my knowledge has come from my own mistakes and research as well as the good people on the AUK Facebook page. In particular Adrian Downie from Brixton Cycles Club and also Leo Tong and Neil Phillips also gave lots of great info after dealing with some of these issues in the Transcontinental race last year. I’ll deal with each issue in turn as not everyone will need the full monty if you like. I’ve also not found an answer to all these issues in one place so collected it here for future reference.
Garmin and navigation
Garmin are a lazy company as far as I can tell. They’ve largely captured the market for cycling computers and seemingly not through excellence but from first to market and being ‘good enough’. As a bit of a nerd I hate this state of affairs. Their UI and software is terrible and often a buggy mess but it largely remains popular for being ok.
I use my Garmin (800 in this case) for two things. Recording the ride and also navigation. I try not to be a slave to it but I don’t buy into pulling out a map all the time and checking the route. I want it to show me left or right at each junction clearly and then get out of the way again so I can concentrate on enjoying the scenery or the company of those I’m riding with. I also want to be able to see a few stats and more importantly record my distance for when when I get back to view on Strava. I know some people hate Strava but I like seeing my achievements and a good bit of data.
All of that stuff is fine and works quite well for rides up to around 200km or 8-10 hours in duration. After that things tend to get a bit screwy, again learnt from bitter experience of losing a 300km ride to a corrupted mess and / or the battery dying and leaving me without any navigation device.
The two issues for me have been keeping enough battery and not corrupting the recorded file. Both of these are actually interlinked and the following is my list of top tips.
Keep it off the maps page – by leaving it on the maps you’re getting the device to constantly re-draw the graphics and poll the GPS more often which uses more battery. Set the device to give you turn by turn directions which will mean that before each junction the map pops up over whatever screen you were looking at before.
Turn the back light off (or down) – this is pretty obvious. It takes more power to keep the light on and you probably don’t need it. Each time you stop / start / touch the device this comes on and uses more power.
Don’t fiddle with it – don’t flick from page to page checking your stats / seeing how long the hill is coming up.
Turn it off when you stop for lunch – if you’re sat in a cafe for 45 mins (including faffing) on a big day out just turn it off
Turn off bluetooth & Wifi – only for newer models but another feature you don’t need if you want to get maximum life out of it for the day. Apparently this isn’t necessary as the 1000 turns it off automtically. Thanks to Chris Smith in the Audax UK Facebook group for this tip.
Stop and reset recording every 150km – after 200km the file your ride is being written to is at far more risk of being corrupted. I don’t know why but I now stop the recording, reset and start a new one every 150km or so. When you get back home you can then stitch the files back together using fitfiletools.com and upload to Strava. This is also useful for rides where you need to say stop at 75km on an audax but you want to include the to and from the start in your overall route when you upload.
Break your route down – if you’re doing something like the Bryan Chapman or Paris Brest Paris the Garmin will really struggle to calculate a 600km+ route. Your planning should account for smaller routes (100-200km perhaps) which you can then use sequentially.
If you’ve done a few audax rides then you will probably have seen people with very large chunky units on their bars. These are the Garmin eTrex range of products and are known for their ability to last a long time on AA batteries which also allows you to replace the batteries as you and extend the life. I don’t have any experience of using these units to date though.
External power
All of the above is fine and will extend the battery life somewhat and will also get you clean, uncorrupted files to upload. But at some point you’ll need to introduce some form of charging into the mix.
The easiest thing is to take a little USB external battery pack. I really like these by Anker on amazon.co.uk. Pretty compact and a decent amount of power to fully top up a Garmin and a phone. These can easily be stowed easily in your jersey or a small bag. I’ve even mounted one under my stem for the Dulwich Dynamo one year.
The next problem is that if you simply plug your Garmin into the charger with a normal mini USB cable it puts the Garmin into data mode and then stops recording and potentially messes your file up. There are two ways of avoiding this. If you’re having a decent stop then stop the Garmin, reset so it writes the file to memory, turn off and charge whilst you’re having your lunch / tea / cake / chat. Then disconnect, turn on and then start recording again.
The other option is to create / buy a power only USB cable. This allows you to run the charger whilst using the Garmin and not have it muck with your recording. There’s a guide of how to create your own here and involves some cutting and soldering but they can also be purchased online. I’ve also modified the end which meets the Garmin to be a 90 degree head and then sealed with Sugru to allow an easier connection into the unit when charging. The USB power pack can then be either taped under the stem or put in a little bar / stem / bar bag.
One thing to watch is that the Garmin is not now weather sealed with the little plug open.
The ideal solution is a dynamo hub. This allows the front wheel to provide free power constantly to a USB female socket and then plug in whatever you want at the other end – phone / Garmin etc using the tips above. I did a bit of research for this and found the best option for cost / value was the SP Dynamo PD-8.
This is available from SJS Cyles for £95 at the time of writing. Alpkit also have a ‘Love Mud Juice’ branded version for £60 which appears to be the same thing.
There’s a slight weight and resistance penalty but I’ve never noticed the latter. Most dynamo hubs and accessories are based around a power rating of 6V / 3W. However the power which comes out of the hub is a little irregular and can lead to issues charging accessories. For instance the iPhone needs constant power for a few seconds before actually charging. The solution to this is a small cache battery which smoothes out these power fluctuations and provides a USB connector also. The best one on the market is the Busch & Müller USB-werk and is around £75 online. It’s pretty compact and comes with a lead to take the power from the hub to the unit via a water proof plug system so it doesn’t need to be on the bike when you’re not using it.
The other end of the unit has a tail where you connect, via another waterproof plug, a USB female connection. Plug your power only USB here and then plug into your Garmin. After a few hundred metres the cache battery will charge and then start kicking out power to the Garmin or phone mounted on your bars. Free power!
Careful not to get the USB connections wet as they are NOT waterproofed in any way and I recently had to replace one after it went rusty. Best to be kept in the dry somehow.
One option that seemed attractive when I was looking at these was some of the stem mounted USB caps where you run a wire inside the steerer and a USB plug appears on the top cap. A few issues stopped me using this solution – they’re really bloody expensive and secondly almost every long distance cyclist I’d read about said they had failed at some point. This is not surprising due to the female USB connector being exposed to the elements.
Lighting
Historically of course the whole point of a dynamo hub is to power a front and rear light. There’s some fancy kit out there but I went with the Supernova E3 Pro 2 (in black of course). Whilst only rated as 60 lux / 200 lumens I’ve found it to be plenty bright enough on dark country roads during an audax. Whilst it doesn’t look like much in town it is more than enough to see potholes ahead if rotated correctly. The cheapest place I’ve found is Rose Bikes for these.
Whilst it doesn’t have the brute-force-scorch-your-eyes brightness of some of the battery powered bigger Exposure units it does make up for this in a really decent beam spread. There are lots of image comparisons of the beam patterns around if you’re so inclined. I’ve never had any problems seeing in pitch black lanes with it and it also has some side light which helps for sideways visibility at night. I have mine mounted on the fork crown although it can be bar mounted. Having it on the fork crown can create a tiny shadow from where it throws light over the front tyre but the can easily be adjusted out in the bracket. It moves in two places which is neat and not being on the bars is much nicer in my opinion. The problem often associated with dynamo lights is that when you’re not moving they stop. This and most modern dynamo lights designs have a stand light built in which lasts for five mins although at a lower power. This isn’t really enough to change a puncture with in pitch black so I usually have a small head torch or mini bar mounted light for this.
I also wanted a rear light to go with this and went with the compatible Supernova E3 Tail Light 2. This wires into the back of the front light NOT directly to the dynamo and again is best sourced from Rose Bikes. Both the ewerk-usb and the light are bi-wired into the same connector that clips onto the hub. It’s worth leaving a little slack here to allow it to clip on and off.
This comes in two versions – a seatpost mounted version and a rear rack mounted version. Both are pretty neat but the seatpost version comes with a thick rubber band mount not the metal mount as shown above. The metal mount is available separately from supernova directly and I was keen to get this as more permanent on the frame. The rear light is really really bright and also has a stand light.
I wired my light to the front light via the internal cable routing of my frame. The only visible wire is down the back of the seat tube and then goes up in the frame and joins a gear cable port on the way out. I had to modify this slightly to get an additional cable through. Internal cable routing is a huge pain but it does look so much neater.
The best thing about dynamo powered lights is that you can grab your bike and run out of the door and not worry about having charged your lights. It’s made my winter bike a joy to use and removed another source of anxiety from longer rides. I’ll always have light and my Garmin will always be powered.
It’s worth noting that running a powered device such as the Garmin and the lights at the same time is a bit problematic. The lights won’t reach full brightness and will flicker at slower speeds due to the power demands on the hub. The solution to this is to make sure you do all your charging during daylight hours and then switch to lighting during the night. So you’re back to the original power saving tips at the start of this post to get the best of this but I’ve not had any problems with this yet. You do need to actually disconnect the ewerk-usb fully though for this to happen otherwise the cache battery will still draw power.
The Supernova range isn’t cheap but if on a budget I would highly recommend the Busch & Müller system which I use on my town bike and again has been fantastic. I use the Lumotec IQ Cyo Premium T senso plus lamp which actually has a higher output than the Supernova at 80lux and is only £45 on Rose bikes. There is also a version of this which has a USB connector and cache battery built in although have not tested this myself.
The rear light is the Busch & Müller Secula plus tail light which again is a very reasonable £13 on Rose bikes.
These are powered by a very big and heavy Shimano DH-3N31 NT dynamo hub that had a bolted axle for my fixed commuter bike – this was £20 on Rose although is considerably heavier than the SP Dynamo PD-8.
If I’ve missed anything in this post or something isn’t clear then please email me at info(at)andy-matthews.co.uk and I will update it.
The Garmin Edge 800 I have really is a fantastic tool for cycling. Putting aside that they are years behind most phone software, in terms of interface and usability, it’s a wonderful bit of kit, once you get to know it and it’s limitations. There’s a whole other post on how recording all my rides has helped motivate me and so on but that’s for another time.
Doing longer rides with it can be problematic as we found out last year doing London > Brighton > London on Leo’s super hilly variation of the route. Mine died at 202km leaving us without directions for the last bit. I am generally using it for recording as well as turn by turn directions. Following that mishap I found out that if you use the maps or elevation page too much it severely drains the battery, you also need to turn the backlight off. For subsequent big rides I’ve been a bit more careful and also carried an external battery pack although not needed to use it.
I recently did the fantastic Oasts and Coasts audax which I managed to completely screw up my recording as well as lose directions towards the end after the Garmin died. I plugged my USB cable in which reset the device at 155km and it then stopped recording – although didn’t make me aware of this. It turns out that if you want to record a long ride that most people break it down into 150km chunks then stitch the resulting .fit files back together into one with the fantastic fitfiletools.com. Lesson learnt!
Following this I have done some reading and it appears most audax folk use the Garmin eTrex type unit rather than the Edge type units which work ok for roadies. The eTrex unit has physical buttons rather than a touch screen and also, more importantly, takes AA batteries which apparently last for days. A lot of forum posts note the lack of decent official bike mount as well as horror stories of losing it on a ride in bushes at night. Most seem to recommend the RAM mount. It’s generally used by hikers and more general outdoors type pursuits but also used for geocaching which I’d never heard of before.
Geocaching is an outdoor recreational activity, in which participants use a Global Positioning System (GPS) receiver or mobile device and other navigational techniques to hide and seek containers, called “geocaches” or “caches”, anywhere in the world.
A typical cache is a small waterproof container containing a logbook (with a pen or pencil). The geocacher enters the date they found it and signs it with their established code name. After signing the log, the cache must be placed back exactly where the person found it. Larger containers such as plastic storage containers (Tupperware or similar) or ammunition boxes can also contain items for trading, usually toys or trinkets of little financial value, although sometimes they are sentimental. Geocaching shares many aspects with benchmarking, trigpointing, orienteering, treasure-hunting, letterboxing, and waymarking.
Which sounds pretty nerdy.
So that’s great but I’m not really up for spending money on another GPS device at the moment. I wanted to solve the issue of battery life and Adrian from Brixton CC pointed me in the direction of an article about how to create a power only micro USB cable. Apparently it’s the data pins in the cable connecting which stops it just charging and puts it into a data sync mode – which is why mine screwed up. So tonight I’ve been following this article and slicing up an old USB cable to make one.
To my surprise it seems to have worked. All I have to do now is solder it at work and seal it up with electrical tape and then go and test it out a few times. A lot cheaper than a new device.
Whilst researching all of this I found myself in the wonderful world of dynamo hubs. There’s all manner of wonderful kit out there now with road hubs that will power USB ports built into a stem cap! Whilst the hubs are a bit expensive it is a really neat idea. Anyway, the 30p cable will do for now. I’m hoping to use this setup on a big ride next month. Can’t wait.
Since using Strava this last year I’ve found a few nice little tools that either expand on the service somehow or extend it via their API and make it better or do something interesting that I thought would be worth sharing.
This little tool takes your Strava (or Runkeeper) activities for a set period to make “your exercise data as art”. You simply allow it to talk to your Strava account and then play with a few variables to get a nice A3 sized print and an image you can then share online. The graphics it produces are from the shapes created by your GPS track which is actually pretty interesting. Hopefully there’s more styles coming soon.
It’s interesting picking out the routes you’ve done. The Isle of Wight is pretty recognisable as is the Brompton race. Regents Park also sticks out whether as it’s own unique shape or tacked on to my commute. Nice to see a few more interesting shapes towards the end of the year though. This is mine from 2014 but it could equally be useful for say a big ride such as Lands End to John O’Groats or a big tour somewhere. Just put the date ranges in and plot a graphic. They do prints at £40 for an A3 one which seems reasonable – the quality is allegedly very good.
Multi ride mapper
This is a seriously clever little tool with lots and lots of configuration variables to allow you to create a unique graphic with your rides overlaid on one map. Again I’ve done the whole of 2014 but again this could be interesting for an event such as LEJOG.
The interface appears complex but it’s pretty simple to control. Once it’s set just hit run and it does its thing. Generating mine was interesting as you see lots of activity in London and then it expanding out gradually as rides got longer and more ambitious.
Anything I’ve missed? Hit me up on Twitter and I’ll add them to the list.
I haven’t fully understood this one yet but it does appear to allow you to cut up your Strava data in a myriad of ways. Data overload perhaps but it looks pretty powerful. Will have a play with this one tomorrow in a bit more detail. There’s also a similar function with the map as well as numerous others.
Now I’m not sure if this has ever been on my wish list as a feature but it’s pretty good to see Adobe come out with an iOS version that syncs with Lightroom. It’s not a self contained version but a companion app to the full Lightroom which you need to have on your PC/Mac. You also need to be running version 5.4 and have a Creative Cloud account which I’m a massive fan of. At £8.50 a month for Lightroom, Photoshop and Bridge I’m happy to pay for legal software.
Anyway to use it you download your shots to your host machine. Create a collection and right click and choose sync with Lightroom mobile.
Then pop over to your iPad and see the photos appear in the app. They’re not the actual photos but enough data to render a decent sized preview and some metadata which gets synced back to your host machine. You have the usual grid of images which is fairly familiar to work with.
Tapping on an image takes you to a larger view where you can flick up to pick and down to reject. This is the first part of my editing process so it’s nice to be able to do this bit from the sofa before heading back to the machine to do more in depth edits. Having done my picks you can then sort by this to then go in and do a bit more work.
Whilst you’d never really want to do colour accurate work on an iPad it’s nice to be able to flick through and have a rough edit at exposure and white balance.
It’s also possible to do crops, add clarity and contrast and most of the basic edits and the overlaid histogram helps. The interface for the white balance presets is pretty intuitive and the previews are nice for those who are less familiar with white balance adjustment. There are also presets but these are the stock ones not any you’ve built yourself. I’m sure these will come soon though.
My iPad mini wasn’t entirely up to rendering my X100 files, or previews of, overly quickly but I guess this is aimed at a new iPad air which has far better graphics. Still it’s nothing that would stop me working, just at a slightly more leisurely pace perhaps.
When I got back to the Mac my work had all synced and I went in and did a little more and fine tuned a few. 80& of what I had done was good though. I did some brush work on a few to bring out some detail which clearly couldn’t be done on the iPad at this stage although the touch screen would make this very intuitive.
The last part of this process was to add my shots to the map which I sometimes do. I noticed that it was still syncing back to the cloud and after a while it crashed.
Unfortunately this meant killing the sync and starting again. My data had made it all one way though so I’m not too bothered about this.
Obviously this has only just been released so I’m not going to be too critical but it’s pretty promising stuff. I wish there was a way to edit my main Lightroom catalog with my laptop from the sofa without VNC or separate catalogues though. Great to see Adobe doing this kind of development and including it for Creative Cloud subscribers. Judging by the comments on the App Store others aren’t as keen.
So long coming but entirely worth it. I spend far less time on Twitter these days and more time in Reeder on iPhone or iPad reading stuff. So it’s nice to have the option to read it all on the Mac again and have it sync to the other devices. I can’t stand any of the various web interfaces.
I’ve avoided using the word ‘pimped’ as it implies a Max Power stuck on type approach to tinkering and adjusting your ride to reach that perfect machine. This thread over on lfgss.com really is quite a treat. Lots of thought, and cash, has gone in to making one of the nicest looking Brompton’s I have ever seen.
Having recently come to terms with my Brompton I’ve completely fallen in love with it for short trips to the station and to site. The only thing which is annoying about it is the weight of carrying it around if you ever have to switch platforms or something. This guy sought to solve that by investigating just how light you could make it through upgrades. There’s also a wealth of information in that thread about longevity of various components, tyres, axle sizes as well as some of the design decisions that went in to making the Brompton so amazing.
Some nice bits include carbon mudguards, lots of Ti bolts, a Ti seat post, carbon bars and even Campag carbon cranks! The end result is pretty impressive but as ever with some of these things it is the working out that proves out clever it is. I bet it flies along!
I’m in the process of selling my white Brompton so I can get the clear lacquered S3L. It’s pretty tempting to go down some of the routes that he has done. A Ti seat post & Carbon bars wouldn’t be too spendy. There’s no way I’d ever go the same extremes but it looks like there’s a couple of easy wins in terms of weight. A lovely project to see and well documented.
I would heartily recommend watching this video of a lecture at MIT by Bruce Schneier entitled “NSA Surveillance and What To Do About It” which covers the NSA, code names, security, the future of the web amongst other things and lots more. Fascinating and rewardingly nerdy from start to finish. In particular this quote about how the NSA’s remit changed from the Cold War era to the post 9/11 era of preventing it ever happening again.
…that’s when the intelligence agencies got an impossible mission. Never again. Make sure this never happens again. If you think about it, if you’re given the goal of making sure something never happens. The only way you can possibly achieve that is to know everything that does happen.