Going tubeless
Whilst I was a little late to the MTB tubeless party I’ve been more of an early adopter on the road scene. I’ve been running tubeless on my mountain bike for around six or so years on ever so unfashionable 26″ wheels (I’m on even less fashionable 29 now). I never had any problems with it and carried a spare tube all that time for nothing.
Now I’m more into the road world I’ve had a go at using tubeless here. Firstly with some 40mm gravel type tyres (WTB Nano 40c) and now on proper road tyres. The former was a bit of a ghetto conversion with only one of the wheels having a tubeless compatible rim but have now had a proper set on wheels built for my audax bike. So rather than explaining it a bunch of times in 20 or so tweets I’ve listed down my method.
So first things first. Wheels. Or more importantly rims. You need compatible rims. Tubeless, TCS or whatever the brand calls them. Essentially they have a deeper hook on the profile to get a good seal. I’ve recently had some road wheels built to go tubeless and new MTB wheels for a little winter bike project.
For the road wheels I went with a SP Dynamo PD8-X and a Hope Pro II Evo for the rear. These were then built with black bladed spokes to some really nice Light Bicycle 35mm deep carbon sections. I’m using 28mm Schwalbe Pro Ones on these and have been brilliant. Lasted a good 3500km before needing to be changed.
On the mountain bike I went with the usual Hope Pro II (eBay bargains) and some WTB rims which were on offer at Planet-X (£9.99 each). I’m using Onza gumwall 2.25 tyres on these.
Before going too far I usually have the tyre on the rim the night before but with a normal tube in. I find this helps shape the tyre and gets the bead neatly seated on one side if you’re careful about how you take the tube out. I’ve found it to be less of an issue with road tyres but helps a bit with bigger volume MTB tyres and to take out the little nicks and folds from where they’ve been packaged up. Probably unnecessary but always like a little bit of extra prep.
In terms of bits you need at a minimum:
– Rim tape
– Valves
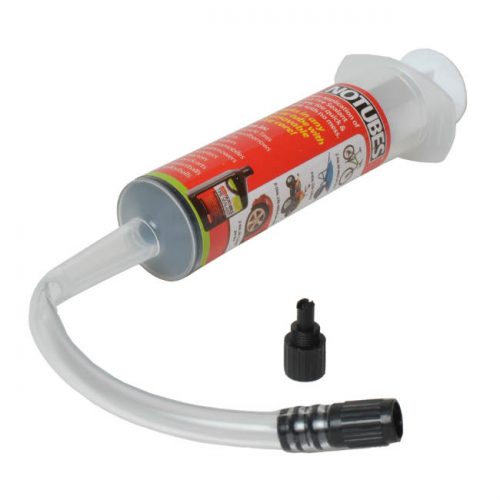
– Sealant
– Compatible rims
– Compatible tyres
– Some patience
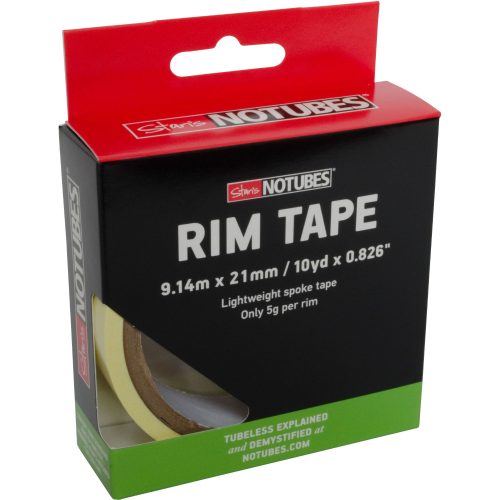
The first step is getting the rim nice and air tight. The wheel builder I use usually does two layers of tubeless rim tape around for me but have also done it myself. I’ve used the Stans tape which comes in a variety of widths. Apparently you can get unbranded stuff on eBay also but you want good coverage from edge to edge to form a good seal. Essentially it’s a thick plastic tape which creates an air tight seal and stops the sealant leaking out in that direction. I clean the surface of the rim first with alcohol swaps first to get the best adhesion possible. Don’t worry about the fact you’ve sealed over where the valve would normally go for now.
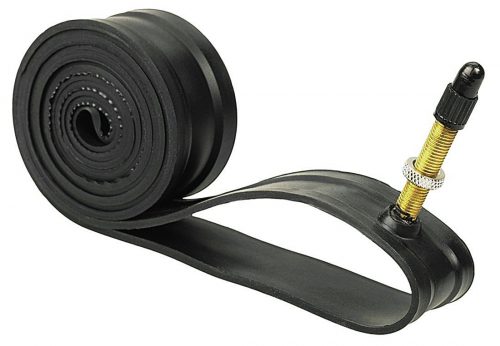
The alternative is to use a rubber rim strip with an integral valve which goes around and does the same thing. I haven’t had as much luck with these and didn’t get such a reliable seal. First time it worked ok but then subsequent times it was a mess and didn’t seal. I don’t recommend but your mileage may vary.
I now just use the rim tape and then the Stans valves. These obviously replace the valves you’d normally have with the tube in. These come in a couple of different sizes and you need to get ones that get through your rims but not too long ideally.
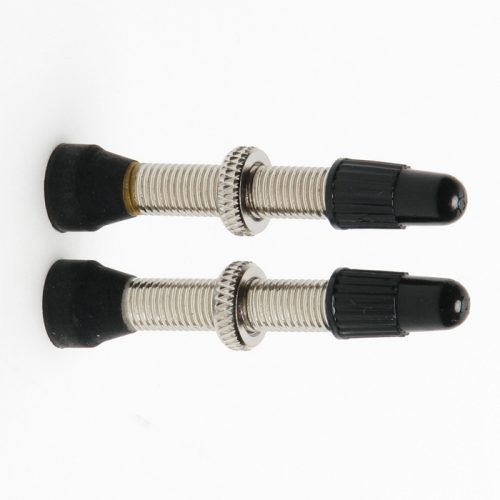
Once the rim tape is on you need to make a small hole at the valve hole in the rim. Then feed the valve through and wind it up tight so as to compress the rubber bung and form a good seal again. The latest top tip is to dip the rubber tip in sealant before winding it up. This further improves the seal as the sealant dries.
After that I get the tyre on, align the logo with the valve hole obviously, and then add some sealant to the system. There’s two ways of doing this. The first is to remove the valve core and use a syringe to add 30ml of sealant. The other way is to to just drop it in with the last bit of the tyre left off before carefully easing it back on. I’ve gone with the latter option recently and has worked well.
After that you need to get some air into it and at a fair old rate to force the bead onto the rim. This should be easier if you’ve had a tube in the night before. I’ve got most to work with a normal track pump and just going quickly but have also used a CO2 cartridge. I wasted the first one by not having the tyre fully over the valve. Now I just hold the tyre down over the valve hole to make sure the air is getting into the tyre. Other options are to use a special track pump that will build a volume of air and then dump it all in in one go or there’s an ‘airshot’ which is another type of the same thing.
If it’s successful you should hear the beads popping and sealing against the rim. I usually top it up with a track pump to make sure this process is completed.
After that I rotate the wheel and chuck it around a bit. Essentially throwing sealant all around the whole thing as far as possible. Wipe down any sealant and check for air leaking out. Leave overnight and hopefully it’s all good in the morning.
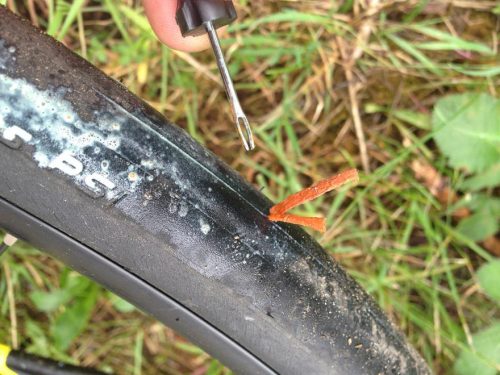
After that you should be good to go. In terms of repairing a tubeless tyre if you get a hole whilst riding… small ones should seal without too much fuss. You might need to top up with air a bit. Otherwise if it doesn’t seal then I put an ‘anchovy’. It’s a little rubber string which you push through the hole, pull out a bit and then trim the excess off. It’s much easier than it sounds! Kits are available and I also carry a tyre boot, a spare valve and a tube. I’ve not needed to use a tube so far though. This review of the kit I use on road.cc show exactly what you need to do!